


- Anatomy
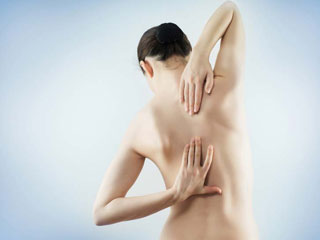
- Back pain (dorsalgia)
- Ankylosing spondylitis and other autoimmune diseases
- Headaches
- Warping (deformation) of the spine
- Hernia
- Treatment in Israel
- Diseases of the muscles and ligaments
- Pathology of the soft tissues of the back
- Neurological symptoms and syndromes
- X-ray and other instrumental methods of diagnosis
- Tumors of the spine and spinal cord
- Osteoporosis, osteopenia
- Osteochondrosis
- The answers to the questions of the visitors
- Pathology of the spinal cord
- Diseases of joints and bone tissue of the vertebrae
- Goods
- Spine injury and back
- Methods of treatment of diseases of the spine
Related Posts


Board simulator device with their hands
Conditions is quite effective, but also expensive equipment, which is used for the treatment of diseases of the spine. The device can be done by hand at home. It will help to effectively eliminate lower back pain caused by infringement of spinal nerves in the spine.

It Should be noted that even industrial prophylactic is made individually depending on the characteristics of the human spine. The inclined Board such devices made from 8 wood. Of course, if you make a simulator with your own hands, there is no need to use expensive materials. The main thing is that the bench have the necessary hardness, low coefficient of friction and high safety.
Design
To understand the principles of production of the simulator with their hands to study its design features.
The Device is a slanted Board that is fixed to the wall. In its upper part has a crossbar, and from the sides of the handle to lock. The slider allows you to adjust the angle of inclination of the Board. This mechanism is the most complex element of the device.
The Bar has high strength, so it can be used as a horizontal bar. Are used to produce high-quality metal pipe made of stainless steel.
drawing, the dimensions and required materials
The Board evmenova with his own hands made the drawing. Before beginning the process it is necessary to buy materials needed:
- Pine timber 50 50 3000 (rough) – long wooden Board for rough construction works. It is desirable that its cutting was made by a circular saw into 2 parts. The length of the first piece must be of equal growth, and the second about 270 mm;

- Furniture particle Board (chipboard) for the work surface. Dimensions: length in line with the increase in width of about 260 mm. To Buy a whole plate don't need to pay extra money. You can take a few doors from the old Cabinet, glue them together and decorate the edge on the edge. Please note – the working surface should not absorb moisture, to be safe, smooth and have a low coefficient of sliding;
- handles for hoes and shovels will be used as the rungs of the Foundation of the dispensary. The length of the cutting should be about 1 meter and its diameter should not exceed 40mm. It is Better if the product presents a soft wood. The length of the second stalk is 1.5 m. It is Desirable that it was trapped under the cone at one end, and the second was made from a harder wood – beech or oak
- Board for stairs, steps and ribs of the carriage. It should also be of hardwood. You can also buy a maple Board 200 by 900 mm
- Spliced mounting rail: 2000х40х2;
- Metal structures and fasteners: bolt, 70 x 8 mm metal rod with thread 8 mm and length not less than 600 mm, washers and nuts for fastening
- to make the trainer more durable it is advisable to purchase dlinnozvennye chain length of 3 meter, which will record the Board. Industrial prophylactic hung on sturdy rope. In the manufacture of boards of the device with their hands will be more convenient to use the chain to adjust the height. Hooks for fixing it easier to attach to the base Board;
- Carabiner galvanized fire;
- Plug spacer twisted
- Set the screws more than 50 mm;
- rubber studding for the bar at the bottom of the Board. Rubber coating shop is not for sale, so it is better to buy a "flea market";
- Fabric upholstery of the carriage and the carrier beam. Its structure must be dense to keep going in folds. Also, the material should have shock-absorbing properties that did not creak under the weight of the body. As this fabric can be used cashmere from an old coat or material military overcoats;
- Set of construction tools.
After purchasing the above products you can start making a slant Board.

How to do the plank exercise machine for yourself
With the able hands to make the simulator itself is quite simple. To do this you must perform the following steps:
- Sanded the handle for the shovel length of 600 mm. Then cut the rubber pieces and cover the end portion of the crossbar. For fixing of material you can use a small clove. For this purpose in rubber, make a small hole through which you put the nails;
- Prepare the timber: cut the required length for the crossbar piece and sanding it to be smooth. Using a milling cutter with the ends of a drilled through hole, and then make jumper
- If you look at the drawing, you may find that the back end of the rod you need to make a mount for the chain. To do this, cut a piece of fabric and wrap the beam. For fixing use a stapler
- Make a semi-circular hole under the chain on the surface of the chipboard. Thread through the hole chain,a bearing surface screws fasten to the wooden beam
- In the ceiling you should mount the hook. He clings to the rifle being snapped chain, fixed bottom Board at an inclination angle of 20 degrees;
- make the Carriage out of the Board, which is cut into 2 fragments of 200 and 320 mm. For the base take a short bar (270 mm) and do it in 2 pass-through holes for rods up to 8 mm. The ends make the groove, to connect the channels together;
- Put the ends on the glue and firmly tighten the nuts of the bolts.
It only Remains to secure the carriage to the beam with nails, which are at the ends. The lower part has a free wheeling. To the print carriage does not slide down, you need to fasten its mounting rail along the length of the beam.
Thus, conditions can be made with your own hands and offers all the same features of the industrial version. It is only necessary to correctly choose the angle of inclination and the degree of rigidity depending on the characteristics of your spine.